If you’ve read our guide on the freezing method for secondhand yarn, you already know how to eliminate pests before they make it into your stash. But what happens after the freeze? How do you keep your yarn safe once it’s been cleared and is ready for storage?
We’ve picked up a few extra tips since writing that original guide, and we wanted to share them with you. Whether you’re building a secondhand yarn stash or are looking to keep your existing collection in great shape, these practices will help you avoid any unwelcome surprises down the road.
Keep Similar Fibers Together, Different Fibers Apart
When you’re bagging yarn for the freezer — and when you’re storing it afterward — group similar fiber types together and keep different ones separated. Moths and carpet beetles specifically target animal fibers like wool, alpaca, cashmere, and mohair because of the keratin protein they contain, making these yarns the most vulnerable in your stash. Plant fibers like cotton and linen, and synthetic fibers like acrylic, attract far less attention from these pests — but storing them alongside an infested animal fiber skein can still turn them into collateral damage.
You also want to keep these apart because certain types of fibers are more coarse than others. For example, mohair does not like coarse wools. In fact, storing a coarse wool skein next to a mohair skein will cause a couple of things to happen:
- Mohair fibers will shed all over your wool skein, whether you were going to use the fibers together or not.
- When the items are moved around in the same bag, they will shuffle a bit. That shuffle can cause the coarse wool to break the sensitive mohair strands, resulting in an unusable skein of mohair!
- Your brand new skeins will turn into skeins in good or fair condition, just from how they were stored!
Stuffing several skeins tightly together also causes significant damage to the skein (and most likely the labels/tags as well). Make sure fibers that are lighter have more room to breathe inside their containers or bags.
Layers: Bags Then Bags Then Bins
Once your yarn has been through the freezing process and passed inspection, here are a few storage habits that will keep it protected for the long haul:
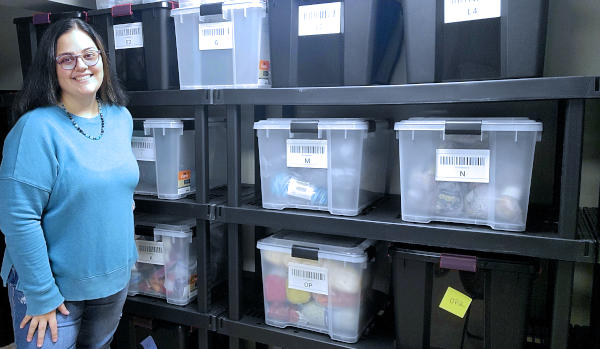
- Bags Then Bags Then Bins: Store each yarn type in its own sealed “zip lock” or similar bag. Store a group of yarns in vacuum sealed bags. Store vacuum sealed bags in airtight, watertight containers. Yarns with issues won’t have a chance to touch anything else in your stash, and you can breathe easy knowing if something goes wrong, the damage stays contained to that one storage group.
- Use airtight AND watertight containers. Go with sealed plastic bins or vacuum bags for the best protection. Cardboard boxes and open baskets might look nicer, but they won’t keep pests out. Keep in mind, pests are tiny little things; the smallest opening is a grand doorway for them to get into your collection.
- Add natural deterrents. Cedar blocks, lavender sachets, or dried rosemary tucked into and around the outside of your storage containers can help discourage moths. These won’t kill pests on their own, but they make your stash a less attractive target.
- Check and toss your stash regularly. Even with all the right precautions, it’s worth doing a quick visual inspection of your stored yarn every few months. You should also set a reminder to physically go through the yarn at least twice a year if not once a quarter. Giving your fibers some chances to stretch will keep them clean and avoid musty storage odors. Catching a problem early is always easier than dealing with one that’s had time to spread.
- Keep your storage area clean and dry. Pests thrive in warm, humid, undisturbed spaces. A clean, dry, well-ventilated storage area goes a long way. Consider a place without a lot of other fabric like materials, like carpets, blankets, etc.
It’s important to be realistic though. Most likely, you cannot follow each of these tips 100%. The point is with your storage is that it’s better to do something than nothing. The more things you add, the better chances your items have a longer shelf life.
Signs of an Active or Past Pest Problem
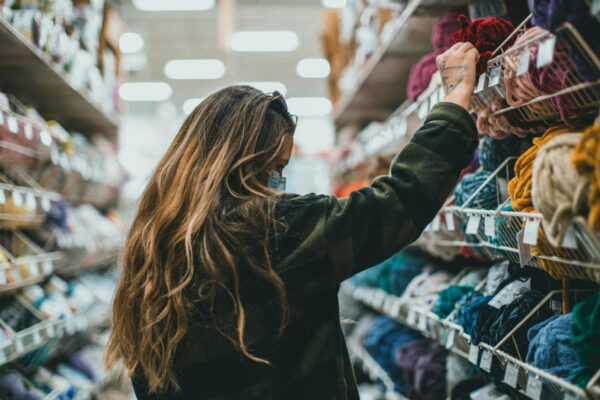
Knowing what to look for can save you a lot of heartache. Before you even purchase secondhand yarn, and again before you bag it for freezing, check for these red flags:
Active infestation signs:
- Small holes or thin spots in the yarn where fibers have been eaten away
- Fine, powdery residue or frass (tiny pest droppings) in the skein or on the label band
- Webbing or silk-like threads woven between strands, especially deeper inside the skein — this is a telltale sign of moth larvae
- Tiny larvae, casings, or live moths or beetles in or around the yarn
- A musty or “off” smell that isn’t just typical thrift store scent
Signs of a past infestation:
- Shed larval casings or cocoons tucked into the skein, even if no live bugs are present
- Irregular weak spots in the yarn that break easily when you give it a gentle tug
- Small dark specks embedded in the fibers that could be old frass or remains
- Visible damage to labels or bands, since pests don’t discriminate
If you see signs of an active infestation, don’t panic — that’s exactly what the freezing method is for. But you may want to double-bag those skeins and keep them well away from your clean stash until you’ve completed the full freeze-thaw-freeze cycle. If the yarn shows heavy damage with lots of weak spots and breakage, it may not be worth saving, unfortunately. Trust your gut on that one.
Done the Right Way, a Secondhand Yarn Stash Is Friendly to Your Wallet and the Environment
Building a secondhand yarn stash is one of the most rewarding parts of the fiber arts community. With a little care and attention, you can keep your collection safe, pest-free, and ready for your next project. Happy yarning!

Leave a Reply